


Introduction
Welcoming you to our comprehensive manual entitled “A Step-by-Step Guide: Setting up Jenkins on Amazon EC2 Instance with Ubuntu.” You have reached the proper location if you wish to incorporate Jenkins into your workflow. The configuration of a Jenkins server on an AWS EC2 instance is covered in this tutorial; Jenkins is an essential component of the DevOps ecosystem. We selected Ubuntu due to its dependability and user-friendliness. Whether you are a novice in Jenkins or seeking to enhance your configuration abilities, this comprehensive guide will assist you in accomplishing all requisite tasks to activate your Jenkins server on the Amazon cloud. Commence constructing a resilient CI/CD environment utilizing Jenkins on EC2 immediately.
Table of Contents
Step 1: Launching an EC2 Instance for Jenkins
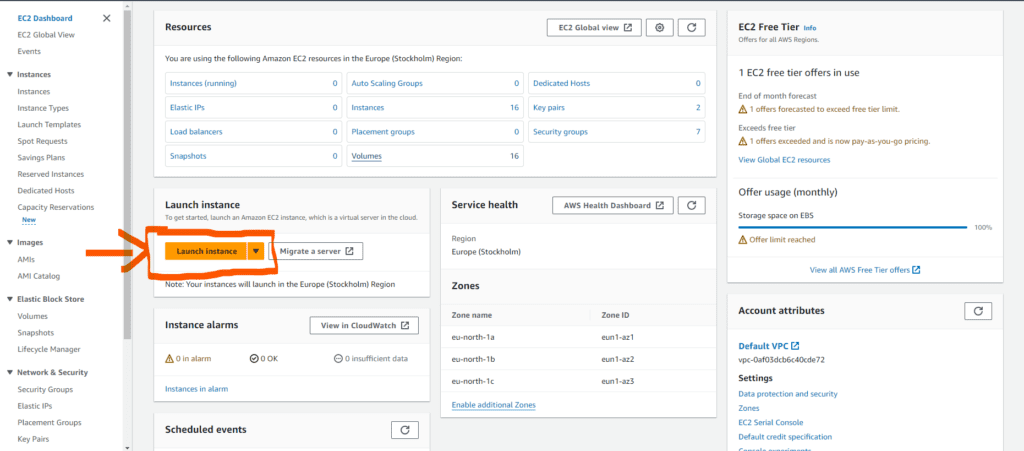
To get started, log in to your AWS account. Once you’re in the AWS Management Console, locate the EC2 dashboard. You’ll find it in the list of AWS services. Click on it to access the EC2 dashboard.
Once you’re in the EC2 dashboard, your journey begins. The first thing you’ll notice is the prominent “Launch Instance” button. Click on it, and you’ll be taken to the Launch Instance screen.

Step 2: Configuring the Instance Details for Jenkins on Amazon EC2
- Name: Give your instance a name, like “Jenkins_Server.”
- Application and OS Image: Select “Ubuntu” and choose “Ubuntu Server 22.04 LTS (HTVM), SSD Volume Type.”
- Instance Type: Opt for a “t3.medium” instance with 4GB of memory.
- Key Pair: Create a new key pair named “Jenkins_key,” select “RSA” as the Key Pair Type, and choose “private key file format” as “.pem.”


Step 3: Network Settings for Your Jenkins EC2 Instance
- VPC, Subnet, and Auto-assign Public IP: Leave these settings as they are.

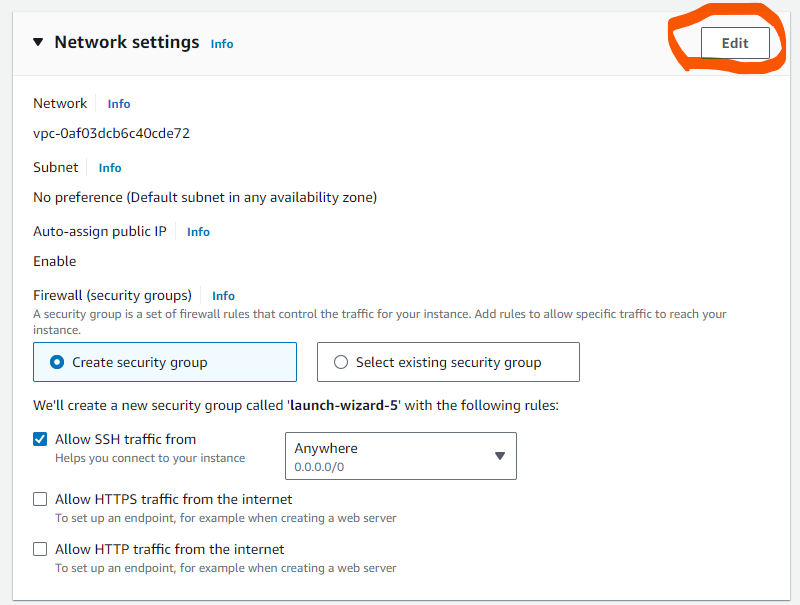
- Add Security Group Rules: Add two security group rules: one for SSH and another for the custom TCP port that Jenkins will use.

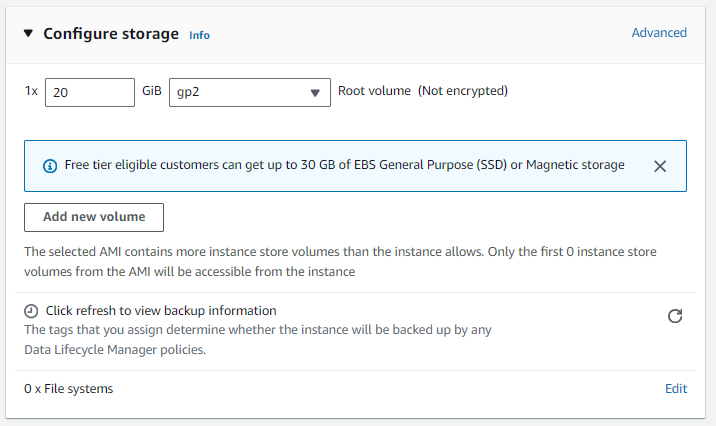
Step 4: Configuring Storage for Jenkins on Amazon EC2
Allocate 20GB of storage to the instance.

Step 5: Launching the Jenkins Instance on Amazon EC2
Click on the “Launch Instance” button, and your EC2 instance will be created.


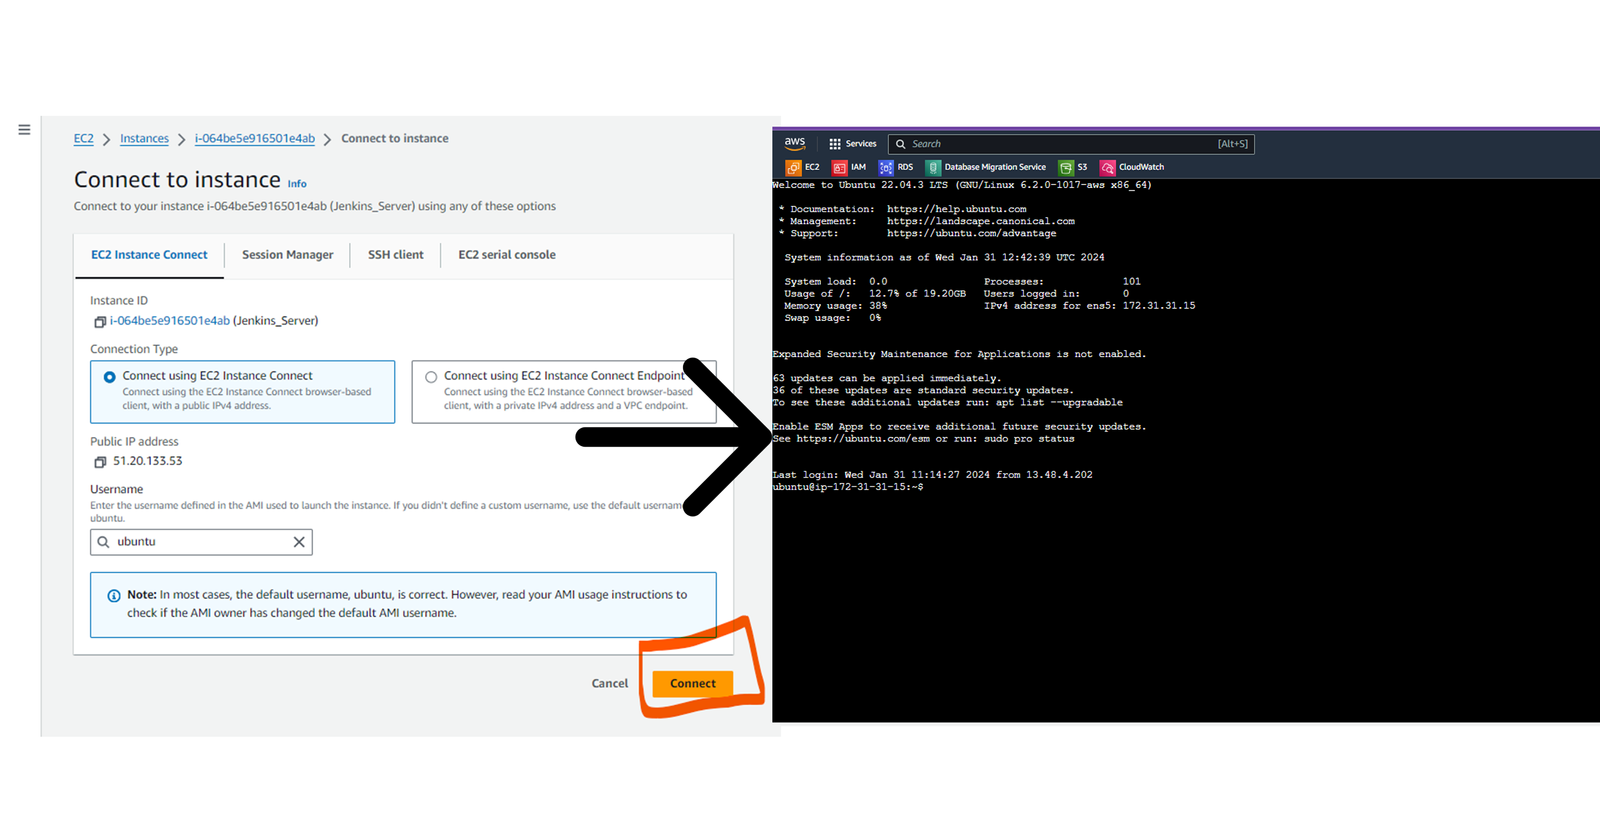
Step 6: Connecting to Your Jenkins Instance on Amazon EC2
- Go to the “Instances” section, select your instance, and click “Connect.”

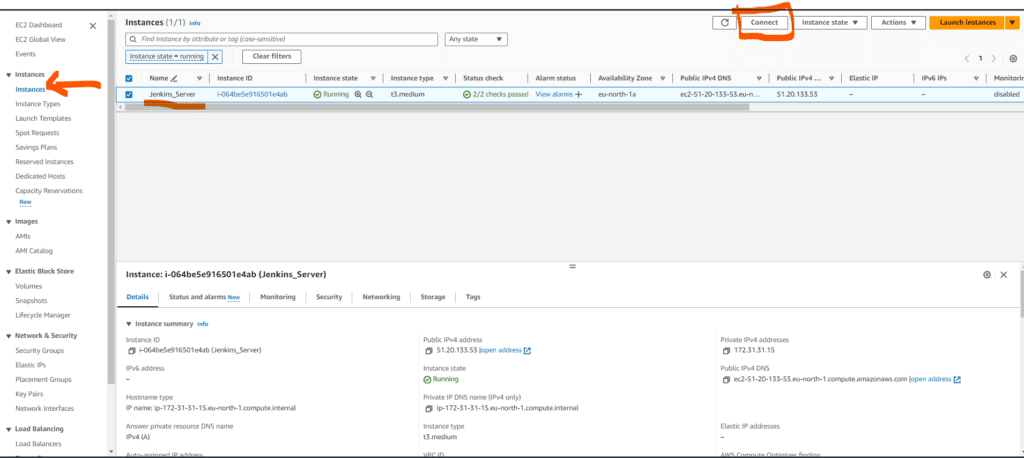
- Click “Connect” again to access the console.

Step 6: Setting Up Jenkins
Run the following commands in the console:
- sudo apt update (Updates the package repository.)
- sudo apt install openjdk-11-jre-headless -y (Installs Java Runtime Environment (JRE) 11.)
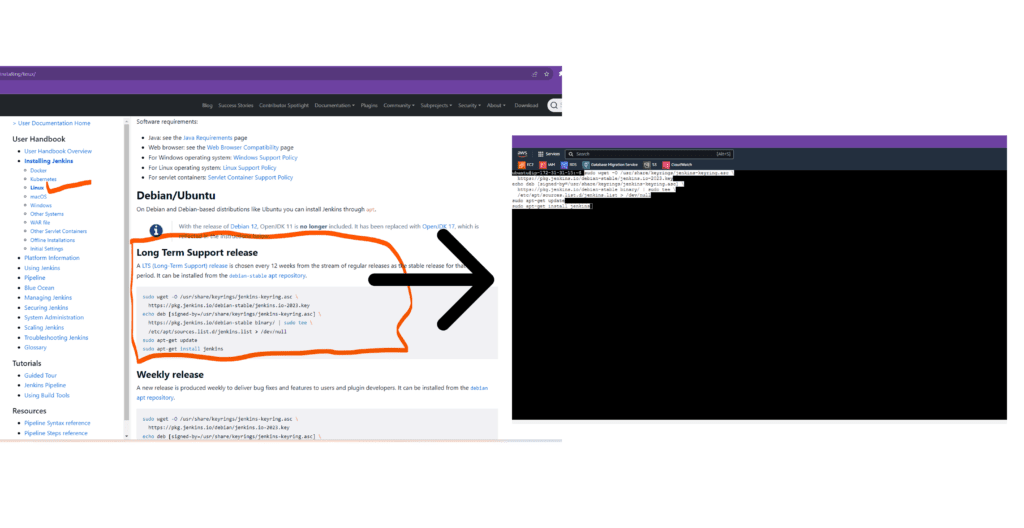
Step 7: Jenkins Installation Process on Amazon EC2
- Visit the Jenkins website and navigate to the Linux section.
- Copy all Long Term Support release commands and paste them into the console. These commands install Jenkins.
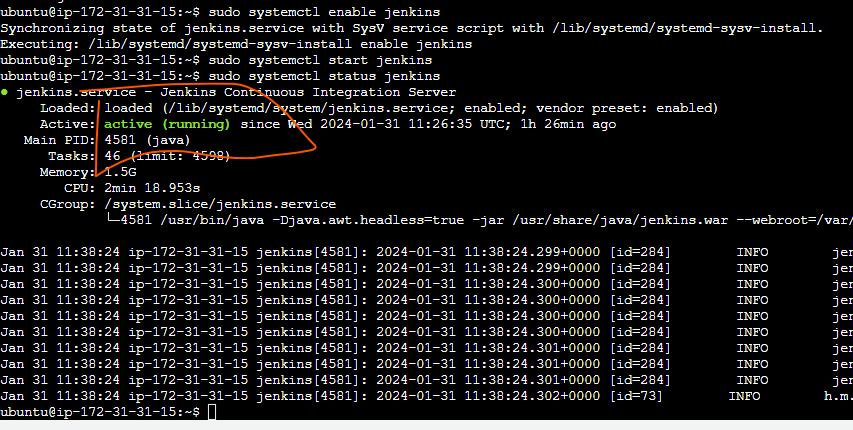
Step 8: Starting and Verifying Jenkins on Amazon EC2
Run these commands:
- sudo systemctl enable jenkins (Enables Jenkins to start on boot.)
- sudo systemctl start jenkins (Starts the Jenkins service.)
- sudo systemctl status jenkins (Checks the status of Jenkins.)
The console should display “active (running)” for Jenkins.

Step 9: Accessing the Jenkins Interface on Amazon EC2
- Copy the public IP address of your instance.
- Access Jenkins in your web browser using the following URL: http://<public_ip_address>:8080.


Step 10: Retrieving the Administrator Password for Jenkins on EC2
Run this command to retrieve the initial admin password:
- sudo cat /var/lib/jenkins/secrets/initialAdminPassword


Copy the password and paste it into the Jenkins administrator password field on the web portal. Continue.
Step 11: Customizing Jenkins on Your Amazon EC2 Instance
- You will be prompted to install suggested plugins. Select this option to enhance Jenkins functionality.
- After installation, change the password.
Conclusion
Congratulations! You’ve successfully set up Jenkins on an Amazon EC2 instance running Ubuntu 22.04 LTS. With Jenkins in place, you can now automate your software development workflows and enjoy the benefits of continuous integration and continuous deployment. Happy coding!

